platform与设备树#
设备树下的platform#
在设备树引入之后,platform结构中的platform_device就可以用设备树去代替了。设备树下的platform驱动相较于原始的platform驱动,只需要把platform_device中描述的设备信息放到设备树中,同时修改paltform_drvier中对资源的读取方法即可。
在设备树中描述设备信息
使用platform_device时,我们可以通过name字段或者id_table来匹配设备和驱动,当platform_device变成设备树时,根据上一章在platform_bus中的介绍,则使用of_match_table方法来匹配。of_match_table对于设备树来说,要做的事,就是保证设备节点的compatible属性和platform_driver中的compatible保持一致。
alinxled {
compatible = "alinx-led";
pinctrl-names = "default";
pinctrl-0 = <&pinctrl_led_default>;
alinxled-gpios = <&gpio0 0 0>;
};
除了这点要注意之外,设备树的写法就没有什么特别的了。
of_match_table
paltform_drvier中的compatible属性设置在上一章中已经介绍过了,compatible 位于paltform_drvier->device_driver-> of_device_id->compatible,保证和设备树中的compatible字段一致即可。of_device_id结构体在paltform_drvier结构体中的成员名为of_match_table,of匹配表。初始化示例如下:
static const struct of_device_id led_of_match[] = {
/* compatible 字段和设备树中保持一致 */
{ .compatible = "alinx-led" },
{/* Sentinel */}
};
需要注意of_device_id 的最后一个成员必须为空。
还有一点,即使我们不是用name字段做匹配工作device_driver结构体中的name字段还是需要保留,否则在加载驱动时可能会出错。
修改paltform_drvier读取设备信息的方法
既然platform_device换成了设备树,那paltform_drvier读取设备信息的方式肯定得换成of函数了。回顾一下 pinctrl和gpio子系统 章节中的of函数内容,就可以动手来实现设备树下的platform驱动代码了。
实验#
这一章的实验在上一章的基础上,用设备树代替platform_device的情况下,使用platform架构来实现简单的点亮led实验。
原理图#
和 字符设备 章节的内容相同。
设备树#
这里我们只要使用 pinctrl和gpio子系统 章节中下的led节点就可以了,写法都是一样的,直接用就行了。只要注意设备节点中的compatible属性,要和platform_driver中的compatible保持一致。
alinxled {
        compatible = "alinx-led";
        pinctrl-names = "default";
        alinxled-gpios = <&gpio0 0 0>;
};
驱动程序#
使用 petalinux 新建名为”ax-platformdt-drv”的驱动程序,并执行 petalinux-config -c rootfs 命令选上新增的驱动程序。
在 ax-platformdt-drv.c 文件中输入下面的代码:
#include <linux/types.h>
#include <linux/kernel.h>
#include <linux/delay.h>
#include <linux/init.h>
#include <linux/module.h>
#include <linux/errno.h>
#include <linux/gpio.h>
#include <linux/cdev.h>
#include <linux/device.h>
#include <linux/of_gpio.h>
#include <linux/semaphore.h>
#include <linux/timer.h>
#include <linux/irq.h>
#include <linux/wait.h>
#include <linux/poll.h>
#include <linux/fs.h>
#include <linux/fcntl.h>
#include <linux/platform_device.h>
#include <asm/mach/map.h>
#include <asm/uaccess.h>
#include <asm/io.h>

/* 设备节点名称 */
#define DEVICE_NAME       "gpio_leds"
/* 设备号个数 */
#define DEVID_COUNT       1
/* 驱动个数 */
#define DRIVE_COUNT       1
/* 主设备号 */
#define MAJOR_AX
/* 次设备号 */
#define MINOR_AX          0
/* LED点亮时输入的值 */
#define ALINX_LED_ON      1
/* LED熄灭时输入的值 */
#define ALINX_LED_OFF     0

/* 把驱动代码中会用到的数据打包进设备结构体 */
struct alinx_char_dev{
    dev_t              devid;       //设备号
    struct cdev        cdev;        //字符设备
    struct class       *class;      //类
    struct device      *device;     //设备
    struct device_node *nd;         //设备树的设备节点
    int                ax_led_gpio; //gpio号
};
/* 声明设备结构体 */
static struct alinx_char_dev alinx_char = {
    .cdev = {
        .owner = THIS_MODULE,
    },
};

/* open函数实现, 对应到Linux系统调用函数的open函数 */
static int gpio_leds_open(struct inode *inode_p, struct file *file_p)
{
    /* 设置私有数据 */
    file_p->private_data = &alinx_char;

    return 0;
}

/* write函数实现, 对应到Linux系统调用函数的write函数 */
static ssize_t gpio_leds_write(struct file *file_p, const char __user *buf, size_t len, loff_t *loff_t_p)
{
    int retvalue;
    unsigned char databuf[1];
    /* 获取私有数据 */
    struct alinx_char_dev *dev = file_p->private_data;

    /* 获取用户数据 */
    retvalue = copy_from_user(databuf, buf, len);
    if(retvalue < 0)
    {
        printk("alinx led write failed\r\n");
        return -EFAULT;
    }

    if(databuf[0] == ALINX_LED_ON)
    {
        /* gpio_set_value方法设置GPIO的值, 使用!!对0或者1二值化 */
        gpio_set_value(dev->ax_led_gpio, !!0);
    }
    else if(databuf[0] == ALINX_LED_OFF)
    {
        gpio_set_value(dev->ax_led_gpio, !!1);
    }
    else
    {
        printk("gpio_test para err\n");
    }

    return 0;
}

/* release函数实现, 对应到Linux系统调用函数的close函数 */
static int gpio_leds_release(struct inode *inode_p, struct file *file_p)
{
    return 0;
}

/* file_operations结构体声明, 是上面open、write实现函数与系统调用函数对应的关键 */
static struct file_operations ax_char_fops = {
    .owner   = THIS_MODULE,
    .open    = gpio_leds_open,
    .write   = gpio_leds_write,
    .release = gpio_leds_release,
};

/* probe函数实现, 驱动和设备匹配时会被调用 */
static int gpio_leds_probe(struct platform_device *dev)
{
    /* 用于接受返回值 */
    u32 ret = 0;
    /* 获取设备节点 */
    alinx_char.nd = of_find_node_by_path("/alinxled");
    if(alinx_char.nd == NULL)
    {
        printk("gpioled node nost find\r\n");
        return -EINVAL;
    }

    /* 获取节点中gpio标号 */
    alinx_char.ax_led_gpio = of_get_named_gpio(alinx_char.nd, "alinxled-gpios", 0);
    if(alinx_char.ax_led_gpio < 0)
    {
        printk("can not get alinxled-gpios\r\n");
        return -EINVAL;
    }

    /* 把这个io设置为输出 */
    ret = gpio_direction_output(alinx_char.ax_led_gpio, 1);
    if(ret < 0)
    {
        printk("can not set gpio\r\n");
    }

    /* 注册设备号 */
    alloc_chrdev_region(&alinx_char.devid, MINOR_AX, DEVID_COUNT, DEVICE_NAME);

    /* 初始化字符设备结构体 */
    cdev_init(&alinx_char.cdev, &ax_char_fops);

    /* 注册字符设备 */
    cdev_add(&alinx_char.cdev, alinx_char.devid, DRIVE_COUNT);

    /* 创建类 */
    alinx_char.class = class_create(THIS_MODULE, DEVICE_NAME);
    if(IS_ERR(alinx_char.class))
    {
        return PTR_ERR(alinx_char.class);
    }

    /* 创建设备节点 */
    alinx_char.device = device_create(alinx_char.class, NULL,
                                      alinx_char.devid, NULL,
                                      DEVICE_NAME);
    if (IS_ERR(alinx_char.device))
    {
        return PTR_ERR(alinx_char.device);
    }

    return 0;
}

static int gpio_leds_remove(struct platform_device *dev)
{
    /* 注销字符设备 */
    cdev_del(&alinx_char.cdev);

    /* 注销设备号 */
    unregister_chrdev_region(alinx_char.devid, DEVID_COUNT);

    /* 删除设备节点 */
    device_destroy(alinx_char.class, alinx_char.devid);

    /* 删除类 */
    class_destroy(alinx_char.class);
    return 0;
}

/* 初始化of_match_table */
static const struct of_device_id led_of_match[] = {
    /* compatible字段和设备树中保持一致 */
    { .compatible = "alinx-led", },
    {/* Sentinel */}
};


/* 声明并初始化platform驱动 */
static struct platform_driver led_driver = {
    .driver = {
        /* name字段需要保留 */
        .name = "alinx-led",
        /* 用of_match_table代替name匹配 */
        .of_match_table = led_of_match,
    },
    .probe  = gpio_leds_probe,
    .remove = gpio_leds_remove,
};

/* 驱动入口函数 */
static int __init gpio_led_drv_init(void)
{

    /* 在入口函数中调用platform_driver_register, 注册platform驱动 */
    return platform_driver_register(&led_driver);
}

/* 驱动出口函数 */
static void __exit gpio_led_dev_exit(void)
{
    /* 在出口函数中调用platform_driver_register, 卸载platform驱动 */
    platform_driver_unregister(&led_driver);
}

/* 标记加载、卸载函数 */
module_init(gpio_led_drv_init);
module_exit(gpio_led_dev_exit);

/* 驱动描述信息 */
MODULE_AUTHOR("Alinx");
MODULE_ALIAS("gpio_led");
MODULE_DESCRIPTION("PLATFORM DT LED driver");
MODULE_VERSION("v1.0");
MODULE_LICENSE("GPL");
把 pinctrl和gpio子系统 章节的驱动代码和上一章的代码结合起来看,这章的代码其实就是这两张的驱动代码的组合。
platform结构套用上一章的结构,设备树资源获取的方法套用第四章的方法。read、write、release方法和 pinctrl和gpio子系统 章节相同。
为一要注意的就是200行的driver字段,name要保留。of_match_table中的compatible字段要和设备树中的一致。
测试程序#
测试 APP 和 字符设备 章节内容一致,可以使用那一章节的测试程序。
运行测试#
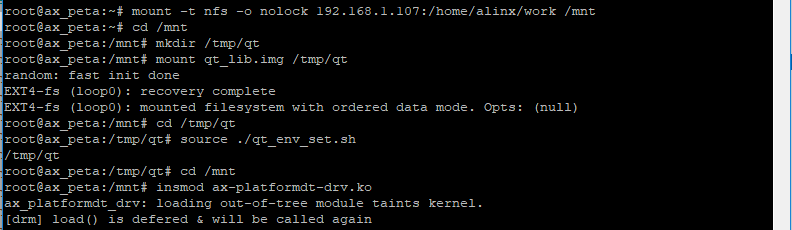
测试方法和上一章基本一致,省去了加载device的命令,步骤如下:
mount -t nfs -o nolock 192.168.1.107:/home/alinx/work /mnt cd /mnt mkdir /tmp/qt mount qt_lib.img /tmp/qt cd /tmp/qt source ./qt_env_set.sh cd /mnt insmod ax-platformdt-drv.ko cd ./build-axleddev_test-ZYNQ-Debug/ ./axleddev_test /dev/gpio_leds on |
IP 和路径根据实际情况调整。
除了led的现象之外,串口工具中的调试结果如下: